CMS, EPiServer, Episerver 11

Notify content editors using the Episerver user notification

In this post I’ll show you how we resolved a use case where the customer wanted to have notifications to content editors when they publish changes to a master page which has language versions.

“Requirement”

Notify editors that they should review content in other languages when they make changes to the master language content. Notification(s) should not be too annoying so no notifications during save – which means we can’t use IValidate<T> implementation to give feedback to user (documentation and a blog posting) as that would be triggered everytime content is saved.

Episerver user notification framework to the rescue

The Episerver user notification was released as beta long time ago, something like CMS core 9.4 (maybe?). Anyways currently is not in the beta release anymore and it is there for us to use it, documentation. So we decided to give it a shot to solve our notification needs as that’s what it is for.

Implementation

The “pseudo code” for the implementation is as follows:

  • have an initialization module to hook up to the content published event
    • register our notification channel with immediate delivery
    • when content is published our notification code should be executed
  • our notification code should check
    • is the published content of certain page type
    • is it the master language version and other languages exists of the content
  • notify the content editor that other languages exists
    • handle situation where the publisher is different user from the content editor
      • notify both users
    • the notification should have link to the master language and to all other language versions

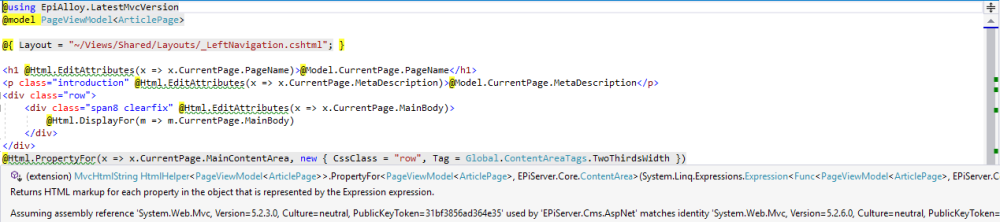
The following code is “Proof-of-concept” done with the Episerver Alloy demo site. So you could grab the code from gist and change namespace and start experimenting with code in your local demo site. The code is commented so I don’t think I need to repeat the same comments in the blog content.


using System;
using System.Collections.Generic;
using System.Linq;
using AlloyWithFind.Models.Pages;
using EPiServer;
using EPiServer.Core;
using EPiServer.Editor;
using EPiServer.Framework;
using EPiServer.Framework.Initialization;
using EPiServer.Logging;
using EPiServer.Notification;
using EPiServer.ServiceLocation;
namespace AlloyWithFind.Business.Initialization
{
[InitializableModule]
[ModuleDependency(typeof(EPiServer.Web.InitializationModule))]
public class UserNotificationsInitialization : IInitializableModule
{
private static readonly ILogger logger = LogManager.GetLogger(typeof(UserNotificationsInitialization));
/// <summary>
/// Name of the channel this notification demo uses.
/// </summary>
public const string NotificationChannelName = "Sample.MasterLanguage.Published";
private IContentEvents contentEvents = null;
private IContentLoader contentLoader = null;
private IContentVersionRepository contentVersionRepository = null;
private INotifier notifier = null;
private static readonly INotificationUser NotificationSender = new NotificationUser("SystemNotificationSender");
private bool isInitialized = false;
public void Initialize(InitializationEngine context)
{
if (!isInitialized)
{
// this is just personal preference to get the reference to local variable
ServiceLocationHelper serviceLocationHelper = context.Locate;
contentEvents = serviceLocationHelper.ContentEvents() ?? throw new Exception("Failed to get IContentEvents from initialization engine context.");
contentLoader = serviceLocationHelper.ContentLoader() ?? throw new Exception("Failed to get IContentLoader from initialization engine context.");
contentVersionRepository = serviceLocationHelper.Advanced.GetInstance<IContentVersionRepository>() ?? throw new Exception("Failed to get IContentVersionRepository from initialization engine context.");
notifier = serviceLocationHelper.Advanced.GetInstance<INotifier>() ?? throw new Exception("Failed to get INotifier from initialization engine context.");
// register the channel with immediate delivery
RegisterChannel(serviceLocationHelper.Advanced.GetInstance<INotificationChannelOptionsRegistry>());
contentEvents.PublishedContent += ContentEventsPublishedContent;
isInitialized = true;
}
}
private void RegisterChannel(INotificationChannelOptionsRegistry notificationChannelOptionsRegistry)
{
if (notificationChannelOptionsRegistry == null)
{
throw new ArgumentNullException(nameof(notificationChannelOptionsRegistry));
}
// is the channel already registered
var channelOptions = notificationChannelOptionsRegistry.Get(NotificationChannelName);
if (channelOptions == null)
{
// register the channel to immediatly notify user
//NOTE: the channel option seems not to be persisted currently (EPiServer.CMS NuGet, version 11.12.0)
//so this code is executed everytime initialization happens
notificationChannelOptionsRegistry.Add(NotificationChannelName, new NotificationChannelOptions(true));
logger.Debug($"Registered notification channel '{NotificationChannelName}' with immediate delivery option.");
}
else
{
logger.Debug($"Notification channel '{NotificationChannelName}' already registered.");
}
}
private void ContentEventsPublishedContent(object sender, ContentEventArgs e)
{
// we are only interested of pages inherited from StandardPage in this demo
// not using SitePageData because container page inherits it – but you get the idea
if (e?.Content is StandardPage page)
{
logger.Debug(page, (state) =>
{
// if debug is not on, this will never get executed
return $"PublishedContent, IsMasterLanguage: '{state.IsMasterLanguageBranch}', has other languages: '{state.ExistingLanguages.Count() > 1}'.";
});
// we are only interested about pages that are published in master language and have other language versions
// if a language version exists it doesn't mean that the language version is published (we don't check that for now)
if (page.IsMasterLanguageBranch && page.ExistingLanguages.Count() > 1 && TryGetReceivers(page, out List<NotificationUser> receivers))
{
// reference without version information
ContentReference contentWithoutVersion = page.ContentLink.ToReferenceWithoutVersion();
// get the master lanuage edit link
string masterCultureName = page.MasterLanguage.Name;
string masterPageEditUrl = PageEditing.GetEditUrlForLanguage(contentWithoutVersion, masterCultureName);
// with PageEditing.GetEditUrlForLanguage we get a link like this:
//http://localhost:12345/EPiServer/CMS//?language=en#context=epi.cms.contentdata:///5
// create a list of "urls" for the other languages
var otherLanguages = page.ExistingLanguages
.Where(ci => !ci.Name.Equals(masterCultureName, StringComparison.OrdinalIgnoreCase))
.Select(ci => CreateLink(PageEditing.GetEditUrlForLanguage(contentWithoutVersion, ci.Name), ci.Name));
NotificationMessage notification = new NotificationMessage()
{
ChannelName = NotificationChannelName,
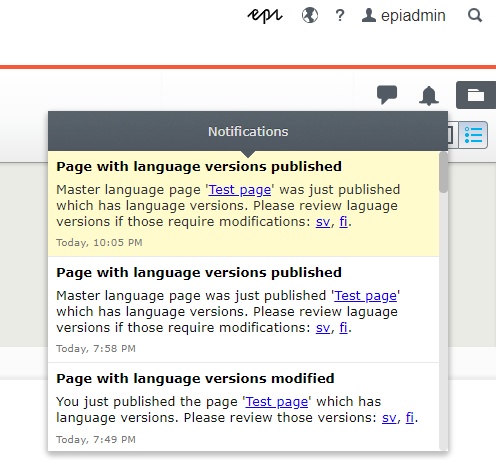
Content = $"Master language page '{CreateLink(masterPageEditUrl, page.Name)}' was just published which has language versions. Please review laguage versions if those require modifications: {string.Join(", ", otherLanguages)}.",
Recipients = receivers,
Sender = NotificationSender,
Subject = "Page with language versions published",
TypeName = "PagePublished"
};
try
{
// always nice to call async code from synchronous code
var task = notifier.PostNotificationAsync(notification);
// blocking hack: https://msdn.microsoft.com/en-us/magazine/mt238404.aspx
// PostNotificationAsync uses ConfigureAwait(false) so this shouldn't deadlock
task.GetAwaiter().GetResult();
}
catch (Exception ex)
{
logger.Error($"Failed to send notification messages to users about published master language page (id: {page.ContentLink?.ID}) with language versions.", ex);
}
}
}
}
private static string CreateLink(string url, string linkText)
{
return $"<a style=\"color:#0000FF;text-decoration:underline;\" href=\"{url}\">{linkText}</a>";
}
/// <summary>
/// Tries to get the recipients from the page changed by or created by and who published tha page.
/// </summary>
/// <param name="page">the page instance</param>
/// <param name="recipients">recipients if the method returns true otherwise empty list</param>
/// <param name="getPublisher">should the username of the published also fetched and included to the recipients</param>
/// <returns>true if a username was taken from page ChangedBy or CreatedBy property or false if no username was found</returns>
private bool TryGetReceivers(PageData page, out List<NotificationUser> recipients, bool getPublisher = true)
{
bool success = false;
recipients = new List<NotificationUser>(2);
if (page != null)
{
string editorUser = null;
if (!string.IsNullOrWhiteSpace(page.ChangedBy))
{
editorUser = page.ChangedBy;
recipients.Add(new NotificationUser(editorUser));
success = true;
}
else if (!string.IsNullOrWhiteSpace(page.CreatedBy))
{
editorUser = page.CreatedBy;
recipients.Add(new NotificationUser(editorUser));
success = true;
}
if (getPublisher)
{
// NOTE: ChangedBy/CreatedBy user is not the same thing as who published the content but it can be
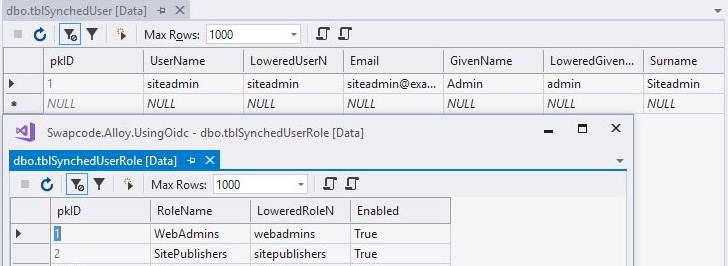
// publisher info is not stored to the page data, the publish state change is stored to 'tblWorkContent'
// so you could view that info in SQL query like this: select * from tblWorkContent where fkContentID = 138
// where the fkContentID is your content id
// get version info
string publisherUsername = contentVersionRepository.LoadPublished(page.ContentLink)?.StatusChangedBy;
// also check that the publisher is not the same user as the editor user
if (!string.IsNullOrWhiteSpace(publisherUsername) && !publisherUsername.Equals(editorUser, StringComparison.OrdinalIgnoreCase))
{
recipients.Add(new NotificationUser(publisherUsername));
success = true;
}
}
if (!success)
{
logger.Warning($"Failed to get notification users for page id: {page.ContentLink?.ID}.");
}
}
return success;
}
public void Uninitialize(InitializationEngine context)
{
if (isInitialized && contentEvents != null)
{
contentEvents.PublishedContent -= ContentEventsPublishedContent;
isInitialized = false;
// on purpose not setting the service references to null
}
}
}
}

Notification displayed to the content editor

user-notification
User notification in action

Wrap-up

The code might not be totally polished but it shows the idea how to use the Episerver user notifications framework. The only “challenge” in the code is the “how to correctly call async from sync code”. Stephen Cleary has blogged a lot about the feared deadlock in ASP.NET (I’m still afraid of that deadlock-monster, and would rather have just sync code or all the way async). So the sample code is using so called “blocking hack” to call async code from sync (Writer of the article is surprise surprise – Stephen Cleary ). He has also created AsyncEx helper library – and the “blocking hack” is included also there in the TaskExtensions.cs file as extension method ‘WaitAndUnwrapException’ (NuGet packages available from NuGet feed).

Other thing is that currently the implementation relies on the Episerver built-in scheduled job to clean read notifications, but that will only remove notifications that are older than three months. So next step will be to have a custom job to clean up these notifications (maybe a short follow up post on how to implement the clean up job).

EPiServer, Episerver Forms, ThisAndThat

Create custom Episerver Forms container

In this blog post I’ll show you how you can create a custom Episerver Forms form container block. Then I will extend it having custom properties to enter the Google Tag Manager related form submit event information.

This is another approach to my previous GTM blog post where I needed to be able to add the information to already existing forms – in that case I created new Episerver Forms block element to add the information.

Getting started

First thing is to install the Episerver Forms NuGet package from Episerver NuGet feed to your project. At the time of writing the latest Episerver Forms NuGet package version is 4.24.0 so I’ll be using that in this sample.

Episerver has instructions to create the custom form container block on their instructions page but the instructions currently make some assumptions and skip the information what you should copy as the base for the customized view file. Related to this is also the instruction to create a two column form container block.

So when you install the Episerver Forms package it will add its files to your project under the ‘modules/_protected‘ folder. The package adds two folders: ‘EPiServer.Forms‘ and ‘EPiServer.Forms.UI‘.

In the EPiServer.Forms.UI folder will be a zip package EPiServer.Forms.UI.zip which contains the JavaScript, CSS, etc. resource files needed by the ‘Episerver edit‘ view.

In the EPiServer.Forms folder will be a zip package ‘EPiServer.Forms.zip‘ which contains the embedded language files, resources for the view templates and more importantly the default Episerver Forms view templates (.ascx files) to render the container and form elements. This zip file contains the ‘FormContainerBlock’ view file that should be copied as the base for our custom view. The folder also contains the ‘Forms.config‘ file that can be used to configure Episerver Forms.

I use the Alloy MVC (the one you can create from the Episerver Visual Studio extension) site in the sample, so its default project structure is used.

Create block, controller and view for the custom form container

We need to implement a custom block to be the container for Forms element blocks. We also need to have a custom controller for our new container block and then a view that renders our container.

Container block implementation

Our custom Forms container block needs to inherit the Episerver base class ‘EPiServer.Forms.Implementation.Elements.FormContainerBlock’.

Create a new folder called ‘Forms‘ under the ‘Models‘ folder. Then add a new Episerver ‘Block Type‘ (using VS add new item) there called ‘SiteFormsContainerBlock‘. Add using statement ‘EPiServer.Forms.Implementation.Elements‘ to the code file and change your block to inherit the ‘FormContainerBlock‘ class. Next edit the ContentType attribute, add a description for your block (info to editors) and then also set this blocks group to be the same as the default container blocks group is (GroupName = EPiServer.Forms.Constants.FormElementGroup_Container).

We also need to tell Episerver about our custom container, so we need to add the ServiceConfiguration attribute to our class: [ServiceConfiguration(typeof(IFormContainerBlock))]. You need to add using statements for ‘EPiServer.Forms.Core’ and ‘EPiServer.ServiceLocation’.

Next we add two custom properties to the container: Google Tag Manager form name and category name. In this sample I will have just two string properties where the editor enters the values but for example for the category a list of possible values could be used (like I used in the previous post the GtmSelectionFactory).


using EPiServer.DataAbstraction;
using EPiServer.DataAnnotations;
using EPiServer.Forms.Core;
using EPiServer.Forms.Implementation.Elements;
using EPiServer.ServiceLocation;
using System.ComponentModel.DataAnnotations;
namespace SampleCustomFormContainer.Models.Forms
{
[ServiceConfiguration(typeof(IFormContainerBlock))]
[ContentType(DisplayName = "SiteFormsContainerBlock",
GUID = "0d416689-3819-4812-b40d-2bdd62ef7eba",
Description = "Episerver Forms container with GTM submit event support.",
GroupName = EPiServer.Forms.Constants.FormElementGroup_Container)]
public class SiteFormsContainerBlock : FormContainerBlock
{
[Display(Name = "GTM form name", Description = "Enter the Google Tag Manager submit event form name.", GroupName = CustomGroupNames.GtmTabName, Order = 10)]
[CultureSpecific(true), Required]
public virtual string GtmFormName { get; set; }
[Display(Name = "GTM category name", Description = "Enter the Google Tag Manager submit event category name.", GroupName = CustomGroupNames.GtmTabName, Order = 20)]
[CultureSpecific(true), Required]
public virtual string GtmCategoryName { get; set; }
}
[GroupDefinitions]
public static class CustomGroupNames
{
// for demo purposes to have this class here
// normally you have your sites tab definitions in one common place
[Display(Name = "Google Tag Manager", Order = 20)]
public const string GtmTabName = "custom-gtm";
}
}

Controller implementation

Next step is to implement the controller for our custom container block. Episerver has a base class for this, so our controller should inherit the ” class.

Add new controller under folder ‘Controllers’ using the Episerver  ‘Block Controller (MVC)’ template and name the new controller ‘SiteFormsContainerBlockController’. Add using statements: ‘EPiServer.Forms.Implementation.Elements‘ and ‘EPiServer.Forms.Controllers‘. Switch the new controller to inherit FormContainerBlockController class and change the type for the index method to ‘FormContainerBlock’ currentBlock. Change the Index method implementation to use ‘return base.Index(currentBlock);’


using EPiServer.Forms.Controllers;
using EPiServer.Forms.Implementation.Elements;
using System.Web.Mvc;
namespace SampleCustomFormContainer.Controllers
{
public class SiteFormsContainerBlockController : FormContainerBlockController
{
public override ActionResult Index(FormContainerBlock currentBlock)
{
return base.Index(currentBlock);
}
}
}

View implementation

So here comes the part where we implement our custom view for the container. First step is to get our “base” view implementation. This is the hacky part, we need to extract the Episerver implementation from the EPiServer.Forms.zip file and then copy paste it as our implementation.

I’ll use the default location for custom Forms view files which is defined in the ‘modules\_protected\EPiServer.Forms\Forms.config‘, see the ‘formElementViewsFolder‘ value. So next create folder ‘~/Views/Shared/ElementBlocks’ and add new view file named ‘FormContainerBlock’, use the Episerver ‘Block Template (Web Forms)‘ to add the view file. Delete the created .ascx.cs and .ascx.designer.cs files for the FormContainerBlock.ascx.

Extract the default implementation to a temporary location: open the EPiServer.Forms.zip file in your favorite archiving tool and extract the ‘Views\ElementBlocks\FormContainerBlock.ascx‘ to temporary location. Open the extracted file in a text editor, copy the file content and paste the text to the just created .ascx file in Visual Studio. Next change the ViewUserControl<FormContainerBlock> to use our custom class: SiteFormsContainerBlock and add using statement for the SiteFormsContainerBlock namespace.

Next we will add the custom properties as data-* properties to the html form element and use custom JavaScript to pull the values from the form when succesful submit is done and create the submission event to Google Tag Manager. See the added data-gtm-formname and data-gtm-formcategory in the below FormContainerBlock.ascx code file.


<%–
====================================
Version: 4.9.1. Modified: 20171030
====================================
–%>
<%@ Import Namespace="System.Web.Mvc" %>
<%@ Import Namespace="EPiServer.Web.Mvc.Html" %>
<%@ Import Namespace="EPiServer.Shell.Web.Mvc.Html" %>
<%@ Import Namespace="EPiServer.Forms" %>
<%@ Import Namespace="EPiServer.Forms.Core" %>
<%@ Import Namespace="EPiServer.Forms.Helpers.Internal" %>
<%@ Import Namespace="EPiServer.Forms.EditView.Internal" %>
<%@ Import Namespace="EPiServer.Forms.Implementation.Elements" %>
<%@ Import Namespace="SampleCustomFormContainer.Models.Forms" %>
<%@ Control Language="C#" Inherits="ViewUserControl<SiteFormsContainerBlock>" %>
<%
var _formConfig = EPiServer.ServiceLocation.ServiceLocator.Current.GetInstance<EPiServer.Forms.Configuration.IEPiServerFormsImplementationConfig>();
// require always our custom GTM JavaScript
EPiServer.Framework.Web.Resources.ClientResources.RequireScript("/static/js/gtm-script.js?v=2").AtFooter();
%>
<% if (EPiServer.Editor.PageEditing.PageIsInEditMode) { %>
<link rel="stylesheet" type="text/css" data-f-resource="EPiServerForms.css" href='<%: ModuleHelper.ToClientResource(typeof(FormsModule), "ClientResources/ViewMode/EPiServerForms.css")%>' />
<% if (Model.Form != null) { %>
<div class="EPiServerForms">
<h2 class="Form__Title"><%: Html.PropertyFor(m => m.Title) %></h2>
<h4 class="Form__Description"><%: Html.PropertyFor(m => m.Description) %></h4>
<%: Html.PropertyFor(m => m.ElementsArea) %>
</div>
<% } else { %>
<%–In case FormContainerBlock is used as a property, we cannot build Form model so we show a warning message to notify user–%>
<div class="EPiServerForms">
<span class="Form__Warning"><%: Html.Translate("/episerver/forms/editview/cannotbuildformmodel") %></span>
</div>
<% } %>
<% } else if (Model.Form != null) { %>
<%–
Using form tag (instead of div) for the sake of html elements' built-in features e.g. reset, file upload
Using enctype="multipart/form-data" for post data and uploading files
–%>
<%
var validationCssClass = ViewBag.ValidationFail ? "ValidationFail" : "ValidationSuccess";
%>
<%–Form will post to its own page Controller –%>
<% if (ViewBag.RenderingFormUsingDivElement) { %>
<%– *** data-gtm-formname and data-gtm-formcategory added compared to original Episerver implementation *** –%>
<div data-f-metadata="<%: Model.MetadataAttribute %>" class="EPiServerForms <%: validationCssClass %>" data-f-type="form" id="<%: Model.Form.FormGuid %>" data-gtm-formname="<%: Model.GtmFormName %>" data-gtm-formcategory="<%: Model.GtmCategoryName %>">
<%} else {%>
<%– *** data-gtm-formname and data-gtm-formcategory added compared to original Episerver implementation *** –%>
<form method="post" novalidate="novalidate"
data-f-metadata="<%: Model.MetadataAttribute %>"
data-gtm-formname="<%: Model.GtmFormName %>"
data-gtm-formcategory="<%: Model.GtmCategoryName %>"
enctype="multipart/form-data" class="EPiServerForms <%: validationCssClass %>" data-f-type="form" id="<%: Model.Form.FormGuid %>">
<%} %>
<%–Meta data, authoring data of this form is transfer to clientside here. We need to take form with language coresponse with current page's language –%>
<script type="text/javascript" src="<%: _formConfig.CoreController %>/GetFormInitScript?formGuid=<%: Model.Form.FormGuid %>&formLanguage=<%: FormsExtensions.GetCurrentFormLanguage(Model) %>"></script>
<%–Meta data, send along as a SYSTEM information about this form, so this can work without JS –%>
<input type="hidden" class="Form__Element Form__SystemElement FormHidden FormHideInSummarized" name="__FormGuid" value="<%: Model.Form.FormGuid %>" data-f-type="hidden" />
<input type="hidden" class="Form__Element Form__SystemElement FormHidden FormHideInSummarized" name="__FormHostedPage" value="<%: FormsExtensions.GetCurrentPageLink().ToString() %>" data-f-type="hidden" />
<input type="hidden" class="Form__Element Form__SystemElement FormHidden FormHideInSummarized" name="__FormLanguage" value="<%: FormsExtensions.GetCurrentFormLanguage(Model) %>" data-f-type="hidden" />
<input type="hidden" class="Form__Element Form__SystemElement FormHidden FormHideInSummarized" name="__FormCurrentStepIndex" value="<%: ViewBag.CurrentStepIndex ?? "" %>" data-f-type="hidden" />
<input type="hidden" class="Form__Element Form__SystemElement FormHidden FormHideInSummarized" name="__FormSubmissionId" value="<%: ViewBag.FormSubmissionId %>" data-f-type="hidden" />
<%= Html.GenerateAntiForgeryToken(Model) %>
<% if (!string.IsNullOrEmpty(Model.Title)) { %> <h2 class="Form__Title"><%: Model.Title %></h2> <% }%>
<% if (!string.IsNullOrEmpty(Model.Description)) { %> <aside class="Form__Description"><%: Model.Description %></aside> <% }%>
<% var statusDisplay = "hide";
var message = ViewBag.Message;
if (ViewBag.FormFinalized || ViewBag.IsProgressiveSubmit){
statusDisplay = "Form__Success__Message";
}
else if (!ViewBag.Submittable && !string.IsNullOrEmpty(message)) {
statusDisplay = "Form__Warning__Message";
}
%>
<%
if (ViewBag.IsReadOnlyMode)
{
%>
<div class="Form__Status">
<span class="Form__Readonly__Message">
<%: Html.Translate("/episerver/forms/viewmode/readonlymode")%>
</span>
</div>
<%
}
%>
<%– area for showing Form's status or validation –%>
<div class="Form__Status">
<div class="Form__Status__Message <%: statusDisplay %>" data-f-form-statusmessage>
<%= message %>
</div>
</div>
<div data-f-mainbody class="Form__MainBody">
<% var i = 0;
var currentStepIndex = ViewBag.CurrentStepIndex == null ? -1 : (int)ViewBag.CurrentStepIndex;
string stepDisplaying;
foreach (var step in Model.Form.Steps) {
stepDisplaying = (currentStepIndex == i && !ViewBag.FormFinalized && (bool)ViewBag.IsStepValidToDisplay) ? "" : "hide"; %>
<section id="<%: step.ElementName %>" data-f-type="step" data-f-element-name="<%: step.ElementName %>" class="Form__Element FormStep Form__Element–NonData <%: stepDisplaying %>" data-f-stepindex="<%: i %>" data-f-element-nondata>
<%
var stepBlock = (step.SourceContent as ElementBlockBase);
if(stepBlock != null)
{
Html.RenderContentData(step.SourceContent, false);
}
%>
<!– Each FormStep groups the elements below it til the next FormStep –>
<%
Html.RenderElementsInStep(i, step.Elements);
%>
</section>
<% i++; } // end foreach steps %>
<% // show Next/Previous buttons when having Steps > 1 and navigationBar when currentStepIndex is valid
var currentDisplayStepCount = Model.Form.Steps.Count();
if (currentDisplayStepCount > 1 && currentStepIndex > -1 && currentStepIndex < currentDisplayStepCount && !ViewBag.FormFinalized) {
string prevButtonDisableState = (currentStepIndex == 0) || !ViewBag.Submittable ? "disabled" : "";
string nextButtonDisableState = (currentStepIndex == currentDisplayStepCount – 1) || !ViewBag.Submittable ? "disabled" : "";
%>
<% if (Model.ShowNavigationBar) { %>
<nav role="navigation" class="Form__NavigationBar" data-f-type="navigationbar" data-f-element-nondata>
<button type="submit" name="submit" value="<%: SubmitButtonType.PreviousStep.ToString() %>" class="Form__NavigationBar__Action FormExcludeDataRebind btnPrev"
<%: prevButtonDisableState %> data-f-navigation-previous>
<%: Html.Translate("/episerver/forms/viewmode/stepnavigation/previous")%></button>
<%
// calculate the progress style on-server-side
var currentDisplayStepIndex = currentStepIndex + 1;
var progressWidth = (100 * currentDisplayStepIndex / currentDisplayStepCount) + "%";
%>
<div class="Form__NavigationBar__ProgressBar">
<div class="Form__NavigationBar__ProgressBar–Progress" style="width: <%: progressWidth %>" data-f-navigation-progress></div>
<div class="Form__NavigationBar__ProgressBar–Text">
<span class="Form__NavigationBar__ProgressBar__ProgressLabel"><%: Html.Translate("/episerver/forms/viewmode/stepnavigation/page")%></span>
<span class="Form__NavigationBar__ProgressBar__CurrentStep" data-f-navigation-currentStep><%:currentDisplayStepIndex %></span>/
<span class="Form__NavigationBar__ProgressBar__StepsCount" data-f-navigation-stepcount><%:currentDisplayStepCount %></span>
</div>
</div>
<button type="submit" name="submit" value="<%: SubmitButtonType.NextStep.ToString() %>" class="Form__NavigationBar__Action FormExcludeDataRebind btnNext"
<%: nextButtonDisableState %> data-f-navigation-next >
<%: Html.Translate("/episerver/forms/viewmode/stepnavigation/next")%></button>
</nav>
<% } %>
<% } // endof if %>
</div>
<%– endof FormMainBody –%>
<% if (ViewBag.RenderingFormUsingDivElement ) { %>
</div>
<%} else{ %>
</form>
<% } %>
<% } %>

Last is the JavaScript file that will extract the data-* attribute values from the form when it is submitted.


if (typeof $$epiforms !== 'undefined') {
$$epiforms(document).ready(function myfunction() {
$$epiforms(".EPiServerForms").on("formsSubmitted", function (event) {
if (event.isFinalizedSubmission && event.isSuccess) {
// we have our custom dataLayer object, we could also have this code somewhere: window.dataLayer = window.dataLayer || []; and then use that
if (typeof dataLayer !== 'undefined') {
var currentForm = $$epiforms(this).get(0);
// using dom native methods, to support wider range of browsers that don't support the 'dataset'
var categoryName = currentForm.getAttribute("data-gtm-formcategory");
var formName = currentForm.getAttribute("data-gtm-formname");
console.log('Form submitted, GTM dataLayer values, category name:[' + categoryName + '] form name:[' + formName + ']');
dataLayer.push({
'event': 'formSubmission',
'formCategory': categoryName,
'formName': formName
});
}
}
});
});
}

view raw

gtm-script.js

hosted with ❤ by GitHub

So this is how it looks in action

custom-forms-container-block-ui
Custom GTM properties on own tab in the form container

In browser console we can see the values taken from data-* attributes and the GTM form submission event triggered.

custom-forms-container-block-js-event

Wrapping it up

As can be seen from the sample, it is quite easy to implement your own custom Episerver Forms container block but it is hack as you need to copy paste the orginal view code to your implementation and modify it. In the long run maintaining the Episerver Forms updates to the view code and synching those back to your custom code might become a nightmare or at least an extra step each time you update the Episerver Forms NuGet package(s).

As a side note you might have spotted in the view file code that Episerver supports rendering the form using HTML div-element. The sample code will inject the data-* attributes also to the div-element and the JavaScript works the same for that case too. To use div-element for the form you need to change the Forms.config value renderingFormUsingDivElement=”false” to value true. BUT when I did this to test the functionality the form submit failed because it is now doing GET instead of POST when submitting the form and endpoint is not found (I didn’t have time to dig this around this time, but will test it later and report it to Episerver support if it is an issue in Episerver implementation and not in my code).

EPiServer, Episerver Forms, Google Analytics

Episerver Forms, add custom GTM dataLayer information to form submission

This post shows you how you can easily create a custom Episerver Forms Element Block to add Google Tag Manager dataLayer information to form submission.

Background for this post: customer had adopted the Episerver Forms but there was no real planning done for the usage other than there was need to have forms that editors can create. The site had some custom forms that used GTM dataLayer in the “form submission” but the Episerver Forms were missing this information. The site already had tens of different forms created with Episerver Forms so it really was not an option to create a custom Episerver Forms container to hold the GTM dataLayer information and convert existing instances to use the custom container – so we needed a new form element that could be dropped to the existing forms.

Its true that the Episerver Form Container metadata could have been used with comma separate list but this would have not been a real usable option from the editors perspective (they would have needed to remember keys to write to the list, etc. not really an option).

Creating TagManagerElementBlock Episerver Forms element

Episerver documentation about creating custom forms elements can be found from the developer documentation (sample block with validation).

So in our case we needed two properties that the editors should be able to set: Name of the form and the category of the form. Name of the form is something that the editors can freely set but the catefory should be a dropdown selection where from the editor can select a predefined value.

I chose to inherit from the Episerver ElementBlockBase class because I didn’t want the block to have anything extra from other possible Episerver Forms element block classes and chose to implement couple of interfaces:

  • IViewModeInvisibleElement – the block renders hidden fields so no need to have end-user visible content
  • IElementRequireClientResources – implementation will need JavaScript on the page to push to the dataLayer object (NOTE! This interface is from Episerver internal namespace: EPiServer.Forms.Core.Internal – consider yourself warned)

Below the TagManagerElementBlock.cs implementation:


using AlloyWithFind.Business.SelectionFactories;
using EPiServer.DataAbstraction;
using EPiServer.DataAnnotations;
using EPiServer.Forms.Core;
using EPiServer.Forms.Core.Internal;
using EPiServer.Forms.EditView;
using EPiServer.Shell.ObjectEditing;
using System;
using System.Collections.Generic;
using System.ComponentModel.DataAnnotations;
namespace AlloyWithFind.Models.FormElements
{
/// <summary>
/// Google Tag Manager category and form name element block.
/// </summary>
[ContentType(DisplayName = "TagManagerElementBlock", GUID = "2fdc67f3-cdb1-4fab-9f00-bf22cf5565ae", GroupName = ConstantsFormsUI.FormElementGroup, Description = "Contains Tag Manager category and form name for a form submission event.", Order = 100)]
public class TagManagerElementBlock : ElementBlockBase, IViewModeInvisibleElement, IElementRequireClientResources // NOTE! IElementRequireClientResources is in Episerver internal namespace!
{
// hide label field from editors
[ScaffoldColumn(false)]
public override string Label { get => base.Label; set => base.Label = value; }
// hide description (aka tooltip) field from editors
[ScaffoldColumn(false)]
public override string Description { get => base.Description; set => base.Description = value; }
[CultureSpecific(true)]
[Display(Name = "FormName", Description = "Enter the Google Tag Manager form name here.", GroupName = SystemTabNames.Content, Order = 10)]
public virtual string FormName { get; set; }
[SelectOne(SelectionFactoryType = typeof(GtmCategorySelectionFactory))]
[CultureSpecific(false)]
[Display(Name = "CategoryName", Description = "Google Tag Manager category name.", GroupName = SystemTabNames.Content, Order = 20)]
public virtual string CategoryName { get; set; }
// this is shown to editors
public override string EditViewFriendlyTitle => $"GTM submission, Form name: '{FormName}', Category name: '{CategoryName}'";
public IEnumerable<Tuple<string, string>> GetExtraResources()
{
return new List<Tuple<string, string>>
{
// injected to the page, contains the GTM javascript to push to datalayer
new Tuple<string, string>("script", "/Static/js/gtm-submission.js?v=1.0")
};
}
public override bool IsElementValidToSubmit()
{
// documentation says that this means can the data be stored as submitted data
// no this doesn't need to be saved
return false;
}
}
}

And the implementation for the GtmCategorySelectionFactory.cs:


using EPiServer.Shell.ObjectEditing;
using System.Collections.Generic;
namespace AlloyWithFind.Business.SelectionFactories
{
/// <summary>
/// Selection factory to return GTM category values for form submission event.
/// </summary>
public class GtmCategorySelectionFactory : ISelectionFactory
{
/// <summary>
/// Gets the GTM category values.
/// </summary>
/// <param name="metadata"></param>
/// <returns>GTM category values</returns>
public IEnumerable<ISelectItem> GetSelections(ExtendedMetadata metadata)
{
// not localized for now
return new List<ISelectItem>
{
new SelectItem{ Text = "CustomerProfile", Value = "customerprofile"},
new SelectItem{ Text = "Commercial", Value = "commercial"},
new SelectItem{ Text = "Other", Value = "other"}
};
}
}
}

And then we need the view file to render the block values in edit mode and in the form:


@using EPiServer.Forms.EditView
@using EPiServer.Editor
@model AlloyWithFind.Models.FormElements.TagManagerElementBlock
@* if in edit mode render the GTM values so that the editor can see them *@
@if (PageEditing.PageIsInEditMode)
{
<span class="Form__Element FormHidden @Html.Raw(ConstantsFormsUI.CSS_InvisibleElement)">@Model.EditViewFriendlyTitle</span>
}
else
{
<input name="gtmFormName" id="@(Model.FormElement.Guid)_name" type="hidden" value="@Model.FormName" class="Form__Element FormHidden FormHideInSummarized" @Html.Raw(Model.AttributesString) data-f-type="hidden" />
<input name="gtmCategoryName" id="@(Model.FormElement.Guid)_category" type="hidden" value="@Model.CategoryName" class="Form__Element FormHidden FormHideInSummarized" @Html.Raw(Model.AttributesString) data-f-type="hidden" />
}

And finally the JavaScript file that gets injected on pages that use Episerver Forms and our TagManagerElementBlock instance:


if (typeof $$epiforms !== 'undefined') {
$$epiforms(document).ready(function myfunction() {
$$epiforms(".EPiServerForms").on("formsSubmitted", function (event) {
if (event.isFinalizedSubmission && event.isSuccess) {
// we have our custom dataLayer object, we could also have this code somewhere: window.dataLayer = window.dataLayer || []; and then use that
if (typeof dataLayer !== 'undefined') {
var currentForm = $$epiforms(this).get(0);
var categoryName = currentForm.elements["gtmCategoryName"].value;
var formName = currentForm.elements["gtmFormName"].value;
console.log('Form submitted, GTM dataLayer values, category name:[' + categoryName + '] form name:[' + formName + ']');
dataLayer.push({
'event': 'formSubmission',
'formCategory': categoryName,
'formName': formName
});
}
}
});
});
}

Using the TagManagerElementBlock on a Episerver Forms form

Editors can easily add the new element to existing Episerver Forms in the edit view. Simply drag and drop the new block to a form and set the GTM values.

tag-manager-element-block-properties

I’ve placed the TagManagerElementBlock on a sample Episerver Form on the Alloy sample site:

tag-manager-element-block-demo-form

And in the browser developer tools console we can see the push to the dataLayer object:

tag-manager-element-block-datalayer-object

Wrap up

So I’ve showed you with sample code how you can easily create your own custom Episerver Forms and a sample case to add Google Tag Manager dataLayer events data to form submission. Easy to use for editors and marketing is happy to get the analytics from form submissions.

EPiServer, TinyMCE

Cache busting Episerver TinyMCE editor resources

In this blog post I’ll show you the possible caching issue with TinyMCE editor style resources and how You could easily work around it. I’ll be using the Episerver Alloy sample site to demonstrate the issue and how to work around most of the issues.

This post is not about how the TinyMCE editor is configured in Episerver so making the assumption that you know the basics which you can read from the Episerver TinyMCE documentation and from TinyMCE documentation.

This post is not about cache busting in general either so that you need to google yourself this time.

Background for the problem or how to create the problem

  • you are using the sites styles in the TinyMCE editor (ContentCss(“…”))
  • you have added custom styles and localization support for the texts
    • meaning you have added styleselect dropdown to toolbar and added custom StyleFormats
  • you want to add new style formats after first release
  • you want to modify the localization texts
  • you are not using asp.net bundling or custom finger printing for resources (if not, you should be :D)
    • old but working sample by Mads Kristensen: Cache busting in ASP.NET
    • nowadays you most likely are using gulp tasks to minify, bundle and version your resources (but this is another story)
  • you could still have this issue even if you are using custom fingerprinting because you are not feeding the fingerprinted url for the resources in the editor

Demonstration with Alloy sample site

I want the editors to be able to use the ‘introduction’ CSS class defined in Alloy style.css file. So quick modifications to the ExtendedTinyMceInitialization.cs file to add the styleselect dropdown to toolbar and to define custom style formats (I’ll later in the posting link a gist where you can see the whole configuration).

Now when running the sample site I have a style select dropwdown and see my new style format in the list – no problem here. Lets pretend we have done a release and in the next sprint we have a requirement that we need a new style ‘ingress’ for the editors. No problem, we add a new style to style.css file and also add it to our custom style formats. Make a deployment to test environment and get a bug from tester that the style is not working in editor – but it was working for you (most likely because you were hitting ctrl+F5 in browser or had disabled caching in browser developer tools).

Lazy developers tell the tester that they need to clear their browser cache that the problem is in their browser (these developers deserver a slap/punch to their face). Yes, in this case it is about browser caching but you as a developer can/should fix it – cache busting anyone?

If we open browser developer tools and look to network tab and find style.css we can see that it is cached in this case for 24 hours (Cache-Control: max-age=86400) – as we are not using cache busting for the resource the browser doesn’t know that the file has actually changed (this applies both to edit mode and when browsing the site as an anonymous user WHEN using debug build as there is no cache busting from the used ASP.NET bundling).

Quick and dirty cache busting for Alloy sample

TinyMCE has a setting cache_suffix for this purpose: “This option lets you add a custom cache buster URL part at the end of each request tinymce makes to load CSS, scripts, etc.“. So quick fix is to add this setting but it also means maintenance work everytime styles are modified (and that is why we usually want to use gulp tasks to generate our styles, minify, bundle and version the files for example with gulp-rev). If we now just add the setting like this: .AddSetting(“cache_suffix”, “?v=1.0.2”). This will not work in the case of Alloy because it uses editor.css as the content css file which uses import to load bootstrap.css and style.css, so we will also need to change the content css definition to the editor: .ContentCss(“/static/css/bootstrap.css”, “/static/css/style.css”). Now when editor is loaded we can see that these resources are prefixed now with the cache busting querystring value: v=1.0.2

tinymce-cache_suffix

This fixed the editor to load the cache busted versions of bootstrap.css and style.css but it also uses the cache busting querystring for 12 Episerver resources that actually already have the cache busting in the path of the resource. So the cache_suffix from TinyMCE settings is not really the best option here. Better option in this case is to manually add the querystring cache busting to the resources we need to cache bust (NOTE! even though it is the editor interface you should try to avoid any unnecessary calls to server to keep the editor experience snappy – so thats why we are not cache busting resources that don’t need to be cache busted, every millisecond counts or second on slow connections).

So new try is to just cache bust the one style resource like this (first remove the TinyMCE cache_suffix setting completely): .ContentCss(“/static/css/bootstrap.css”, “/static/css/style.css?v=1.0.3”)

tinymce-custom-cache_suffix

With that change looks better as we only now cache bust the style file that has changes.

The TinyMCE initialization code:


using AlloyWithFind.Models.Blocks;
using AlloyWithFind.Models.Pages;
using EPiServer.Cms.TinyMce.Core;
using EPiServer.Framework;
using EPiServer.Framework.Initialization;
using EPiServer.ServiceLocation;
namespace AlloyWithFind.Business.Initialization
{
[ModuleDependency(typeof(TinyMceInitialization))]
public class ExtendedTinyMceInitialization : IConfigurableModule
{
public void Initialize(InitializationEngine context)
{
}
public void Uninitialize(InitializationEngine context)
{
}
public void ConfigureContainer(ServiceConfigurationContext context)
{
context.Services.Configure<TinyMceConfiguration>(config =>
{
// Add content CSS to the default settings.
config.Default()
.Width(748) // make the editor wider
.Height(450) // make the editor taller
.AddPlugin("code") // code plugin to view the source html of editor
.Toolbar("formatselect styleselect | bold italic | epi-link image epi-image-editor epi-personalized-content | bullist numlist outdent indent | code searchreplace fullscreen | help")
//.ContentCss("/static/css/editor.css") // this brings in bootstrap.css and style.css using import but then we can't cache bust those resources
.ContentCss("/static/css/bootstrap.css", "/static/css/style.css?v=1.0.3")
//.AddSetting("cache_suffix", "?v=1.0.2") // don't use as it also cache busts Episerver resources which already have cache busting
.StyleFormats(
new
{
title = "title-paragraph-styles",
items = new[]
{
new { title = "title-introduction", selector = "p", classes = "introduction" },
new { title = "title-ingress", selector = "p", classes = "ingress" }
}
}
)
.AddSetting("style_formats_autohide", true)// hide styles when those can't be used
.AddSetting("style_formats_merge", true);// tinymce default styles + ours
// This will clone the default settings object and extend it by
// limiting the block formats for the MainBody property of an ArticlePage.
config.For<ArticlePage>(t => t.MainBody)
.BlockFormats("Paragraph=p;Header 1=h1;Header 2=h2;Header 3=h3");
// Passing a second argument to For<> will clone the given settings object
// instead of the default one and extend it with some basic toolbar commands.
config.For<EditorialBlock>(t => t.MainBody, config.Empty())
.AddEpiserverSupport()
.DisableMenubar()
.Toolbar("bold italic underline strikethrough");
});
}
}
}

And the editor looks like this now without the custom styles localized.

tinymce-styles-without-localization

Final step is to localize the editor styles

Next we can localize the TinyMCE style format entries with the following XML language file:


<?xml version="1.0" encoding="utf-8" ?>
<languages>
<language name="English" id="en">
<tinymce>
<editorstyles>
<title-paragraph-styles>Paragraph styles</title-paragraph-styles>
<title-introduction>Introduction</title-introduction>
<title-ingress>Ingress</title-ingress>
</editorstyles>
</tinymce>
</language>
</languages>

But when the editor is loaded we can see that the style entries are not localized! If we now hit zillion times ctrl+F5 or from browser developer tools disable caching we will get the correct localized texts to editor.

This is another caching issue in the editor. The editor localizations come from request to resource: /EPiServer/Shell/11.13.2/ClientResources/EPi/nls/en-us/tinymce.editorstyles.js where “EPiServer” part is your UI url and “11.13.2” part is the version you have currently installed. That resource is cached for 60 minutes (Cache-Control: private, max-age=3600) which could be controlled from web.config as the caching is configured with the ClientResourceCache profile in outputCacheProfiles.

As we saw from cache_suffix network tab screenshot this resource is not affected by TinyMCE cache busting (not requested by it), so there really isn’t a way for us to cache bust this with a setting currently (at least I couldn’t figure out how to do it).

We could create an IIS rewrite redirect rule but I didn’t even bother to try as then we might have an issue with browser remembering the redirect so we would have another issue.

EPiServer.Cms.TinyMce widgets.js seems to have the localization part (epi/i18n!epi/nls/tinymce.editorstyles) and in browser developer tools you can use tinyMCE.i18n to view the localized strings (tinyMCE.i18n.data).

It is currently 0:19am and my brain is saying: No! Maybe someone else can figure out how to cache bust the localization part 😀 and share it to us.

@Episerver could you just give us a setting that we could use to cache bust the editor localizations, pretty please 😉

CMS, EPiServer, Episerver 11

How to hide content types from editors in Episerver which you don’t own

In this blog post I’ll show you two ways how to hide content types which you don’t own (meaning the content types are coming from Episerver or 3rd parties). Simple no coding needed and with an initialization module.

Sometimes you might have a need to hide content types from editors but the problem is that you don’t own and have control over the content type definition. If you own the content and don’t want it to be available for editors then it is a simple value that you set in the ContentTypeAttribute, AvailableInEditMode = false.

Why would you have need to hide some content types? For example if you are using Episerver Find it currently also adds the ‘Customized search block’ (there is a request to have this block in a separate NuGet package, so in the future this point might not be valid anymore) but if you have disabled asp.net session this block will not work because it currently requires the session tempdata to store something. So now you want to hide this one from editors so that they don’t get confused when it doesn’t work but is available.

Another case when you might want to hide content types from editors is that if you use Episerver Forms and have created custom Forms elements and you don’t want to have the default implementations to be available. Another case might be that you just want to hide some of the default elements like the Captcha implementation (Captcha requires session state but Recaptcha doesn’t) because you don’t have session state enabled.

See the documentation about asp.net session state and Episerver. Episerver has a sample Episerver Forms implementation available as NuGet package (includes the Recaptcha) and the source code is available in GitHub.

Hide content type without code

The simplest way to hide a content type from editors without any need for coding is to login to your Episerver instance and navigate to admin view -> Content Type tab. Find the content type that you want to hide from editors and click the content type name in the left panel to select it -> Click the content type ‘Settings’ -> Uncheck the checkbox ‘Available in edit view’ and click save. Content type is no longer available for editors. Remember that you can always revert this change in admin by clicking the ‘Revert to default’ button when viewing a content types settings.

Downside of this is that you need to remember to do this in all of your environments and the setting might change when a NuGet package gets updated.

Hide content type using an intialization module

Another way to hide content types from editors is to do it programmatically using an Episerver initialization module. The module is quite simple: get IContentTypeRepository from the InitializationEngine context, get a content type using its Guid, create a writable clone and set the IsAvailable = false and save using the IContentTypeRepository.

Question is how to get/know the content type Guid? Simple way is to go to Episerver admin view -> Content Type tab -> Select a content type and view its settings.

hide-customized-search-blockhide-forms-captcha-block

In the images I have highlighted the content type Guids (you could also use the name, but I’ll use Guids). So this is the easiest way to find out the Guids of the content types another way would be to use your favorite .Net decompiler and find the content types from code and look the at the ContentTypeAttribute values (why would you do it this way? :D).

Next is the code for the initialization module which hides the content type from editors using the Guid (Gist url for the code).


using System;
using EPiServer.DataAbstraction;
using EPiServer.Framework;
using EPiServer.Framework.Initialization;
using EPiServer.Logging;
namespace AlloyWithFind.Business.Initialization
{
[InitializableModule]
[ModuleDependency(typeof(EPiServer.Web.InitializationModule), typeof(EPiServer.Forms.InitializationModule))]
public class HideContentTypesInitialization : IInitializableModule
{
private static readonly ILogger Logger = LogManager.GetLogger(typeof(HideContentTypesInitialization));
/// <summary>
/// Customized search block Guid.
/// </summary>
public static readonly Guid SearchBlockGuid = new Guid("3a263af2-79d9-4275-ad15-3c3187c89870");
/// <summary>
/// Episerver Forms captcha element Guid.
/// </summary>
public static readonly Guid CaptchaBlockGuid = new Guid("0cffa8b6-3c20-4b97-914f-75a624b19bff");
public void Initialize(InitializationEngine context)
{
// get content types repository
IContentTypeRepository ctRepo = context.Locate.ContentTypeRepository();
HideFromEditors(ctRepo, SearchBlockGuid);
HideFromEditors(ctRepo, CaptchaBlockGuid);
}
private static void HideFromEditors(IContentTypeRepository repo, Guid contentGuid)
{
if (repo == null)
{
throw new ArgumentNullException(nameof(repo));
}
// get content with Guid (returns null if not found)
ContentType content = repo.Load(contentGuid);
if (content != null)
{
if (content.IsAvailable)
{
try
{
// make writable clone, hide and save it
ContentType writable = content.CreateWritableClone() as ContentType;
writable.IsAvailable = false;
repo.Save(writable);
Logger.Information($"Content type with guid '{contentGuid}' (name: {writable.Name}) hidden from editors.");
}
catch (Exception ex)
{
Logger.Error($"Failed to hide content type with guid '{contentGuid}' (name: {content.Name}).", ex);
}
}
else
{
Logger.Information($"Content type with guid '{contentGuid}' (name: {content.Name}) is already hidden from editors.");
}
}
else
{
Logger.Warning($"Cannot hide content type with guid '{contentGuid}' because it was not found from content type repository.");
}
}
public void Uninitialize(InitializationEngine context)
{
//Add uninitialization logic
}
}
}

Note! Your initialization module code should take dependency to the modules that “add” these content types you are modifying. In the sample I’ve taken dependency to the ‘EPiServer.Web.InitializationModule’ and ‘EPiServer.Forms.InitializationModule’ to make sure this module is executed after those. It might be enough to have only dependency to ‘EPiServer.Web.InitializationModule’ as the content types should be already synched at this stage (cheat sheet of intialization modules).

So there you have the initialization module to hide content types from your editors.

But there must be other ways too?

Well yes, there are. There are at least two threads at Episerver World where people have asked how to hide the Episerver Forms container or the default Forms elements when custom elements are created.

The presented solution works BUT it uses the DefaultContentTypeAvailablilityService as a base class which is in Episerver internal namespace ‘EPiServer.DataAbstraction.Internal’. The internal namespace indicates that it is not part of semantic versioning and could change without any notice. So be carefull when using something from internal namespaces. I would rather use this initialization module approach 😉

But one thing to note here is that the big difference with having initialization module vs custom content type availability service is that initialization module hides the content type from ALL users but with custom content type availability service you could use the principal object to hide content types per user or role (ListAvailable methods). The default implementation queries create access right for the user to the content.

So if the ‘DefaultContentTypeAvailablilityService’ uses users create access rights to decide is the content type availabe (for the user) it means we have another no coding required option to hide content types or create an initialization module that removes the create content access right from everyone or modifies it so that certain roles only can create the content type.

So I think you should not have the need to create a custom implementation of ‘ContentTypeAvailabilityService’ to just hide content types from ALL users or certain users/roles because you can do that by modifying the content type availability or by configuring the create access rights for the content.

Content Delivery API, EPiServer

Upgrade Episerver Content Delivery API 1.x site to use version 2.1.0

In this blog post I will show you how to upgrade an Episerver site using Content Delivery API 1.x version to use the just released version 2.1.0. I will use the Episerver Music Festival Vue.js template site as the sample as it is currently using Episerver Content Delivery API 1.0.1.

This post was edited 2018-12-06, I’ve changed the links to my fork to point to an orphaned branch as the Episerver musicfestival master has changed and I want to pull the latest to my master (and I had originally done changes to master).

Episerver Content Delivery API

If you are not familiar or if you are unaware of the Content Delivery API it is basically Episervers response for need to have support for headless CMS. An API that can deliver the same content used on the website to be consumed on SPA “pages”, on other sites, mobile apps and where ever you need the same content used on the traditional “coupled” site.

Look at the Episerver documentation about Content Delivery API.

Changes in Episerver Content Delivery API 2.1.0

The version 1.x was just one NuGet package that contained everything. In version 2.1.0 the single package is splitted to multiple NuGet packages so you as a developer can choose just the ones you need for your implementation. The packages and their purpose are explained in the documentation.

Here is a short recap of the packages:

  • install EPiServer.ContentDeliveryApi.Cms if you just need to be able to deliver content without authentication and search capabilities in the API
  • also install EPiServer.ContentDeliveryApi.OAuth if you need OAuth in the API
  • also install EPiServer.ContentDeliveryApi.Search if you need to support search capabilities in the API (Note! search requires Episerver Find search service)

At the end of the Content Delivery API installation instruction page there are few bullets about upgrading 1.x to 2.x but currently it doesn’t tell everything about the upgrade and changes that you might need to do. But more about the possible changes you might need to do follows in this post.

Episerver MusicFestival Vue.js Templates sample site

Episerver just made public the MusicFestival sample on GitHub. This is a sample site using Content Delivery API (1.0.1 currently) and Vue.js. If you haven’t read the blog posts about the MusicFestival Vue.js Templates then here are a few blog posts you should read:

Upgrading MusicFestival site to use Content Delivery API 2.1.0

To be able to share a real sample of upgrading Content Delivery API 1.x to 2.1.0 the Episerver MusicFestival sample is a perfect case as it is still using the version 1.0.1 of Content Delivery API.

MusicFestival sample doesn’t currently use all the possible features but most likely those are coming to the sample when time goes on.

So first I forked the MusicFestival sample to my GitHub account. My target was to just upgrade and make sure the site works the same way as it worked with the 1.0.1 version. The site includes readiness for all features and configuration for API search so that is the reason why I added all the features in the upgrade so the same readiness to use all features is still there.

After I had forked I just follwed the instructions how to setup MusicFestival and made couple of request to the Content Delivery API and saved the responses (so that I could later compare the results to the upgraded versions results). Next step was to update the EPiServer.ContentDeliveryApi NuGet package and add also add the EPiServer.ContentDeliveryApi.Search package (as it gets removed in the upgrade). After upgrade rebuilding the solution gives 18 errors. Time to fix the errors.

Upgrade errors

Biggest change affecting MusicFestival is that the IPropertyModelHandler has been replaced with IPropertyModelConverter interface (or should I say has been refactored). The refactored interface has also changes in the method and property signatures.

  • GetValue method is now ConvertPropertyModel
  • CanHandleProperty method is now HasPropertyModelAssociatedWith
  • ModelTypes property used to return List<TypeModel> but now returns IEnumerable<TypeModel>

This affects the BuyTicketBlockPropertyModelHandler implementation in MusicFestival sample.

Other changes include changes in namespaces, ContentApiHelper class has been moved to internal namespace EPiServer.ContentApi.Cms.Helpers.Internal and RouteConstants has also been moved to internal namespace EPiServer.ContentApi.Core.Internal.

How we configure Content Delivery API has also changed to use fluent API configuration. This affects the SiteInitialization code.

Fixing upgrade errors

So this part of the post will be a boring list of what was done but you can look this diff in GitHub to see all the changes in one go (and in a much clearer way vs what will follow in the below listing 😀 ).

  • src\MusicFestival.Vue.Template\Infrastructure\Owin\Startup.cs
    • remove: using EPiServer.ContentApi.Authorization;
    • remove: using EPiServer.ContentApi;
    • add: using EPiServer.ContentApi.Cms.Helpers.Internal;
    • add: using EPiServer.ContentApi.OAuth;
  • src\MusicFestival.Vue.Template\Infrastructure\SiteInitialization.cs
    • first remove all unused using clauses
    • add: using EPiServer.ContentApi.Core.Serialization;
    • add: using EPiServer.ContentApi.Core.Configuration;
    • add: using EPiServer.ContentApi.Search;
    • remove code that creates contentApiOptions and calls context.InitializeContentApi(contentApiOptions);
    • remove code that calls context.InitializeContentSearchApi
    • add new code that configures the content API and search
    • edit code: context.Services.AddTransient<IPropertyModelHandler, BuyTicketBlockPropertyModelHandler>();
      • replace IPropertyModelHandler with IPropertyModelConverter
    • after these change there are still two errors but we can ignore those for now
  • src\MusicFestival.Vue.Template\Infrastructure\BuyTicketBlockPropertyModel.cs
    • remove: using EPiServer.ContentApi.Core;
    • add: using EPiServer.ContentApi.Core.Serialization.Models;
  • src\MusicFestival.Vue.Template\Infrastructure\BuyTicketBlockPropertyModelHandler.cs
    • remove: using EPiServer.ContentApi.Core;
    • add: using EPiServer.ContentApi.Core.Serialization;
    • add: using EPiServer.ContentApi.Core.Serialization.Models;
    • replace IPropertyModelHandler with IPropertyModelConverter
    • rename method CanHandleProperty to HasPropertyModelAssociatedWith
    • rename method GetValue to ConvertToPropertyModel
    • change ModelTypes propertys type from List<TypeModel> to IEnumerable<TypeModel>
  • src\MusicFestival.Vue.Template\Models\ExtendedContentModelMapper.cs
    • remove: using EPiServer.ContentApi.Core;
    • add: using EPiServer.ContentApi.Core.Serialization;
    • add: using EPiServer.ContentApi.Core.Serialization.Models;
    • change PropertyModelHandlers property to return IEnumerable<IPropertyModelConverter>
  • src\MusicFestival.Vue.Template\Infrastructure\ContentDeliveryExtendedRouting\RoutingEventHandler.cs
    • RouteConstants.BaseContentApiRoute is in new namespace (internal)
    • so change: EPiServer.ContentApi.RouteConstants.BaseContentApiRoute to EPiServer.ContentApi.Core.Internal.RouteConstants.BaseContentApiRoute

There is also change in the code so that it will call MapHttpAttributeRoutes() and the MusicFestival code has already called this method. This would cause an error when the site start up so you need to disable the Content Delivery API and Search calling this method again. This is documented in Content Delivery API configuration instructions.

  • modify web.config and add the following to appSettings
    • <add key=”episerver:contentdeliverysearch:maphttpattributeroutes” value=”false” />
    • <add key=”episerver:contentdelivery:maphttpattributeroutes” value=”false” />

I also later noticed that MusicFestival sample was having the old signed structuremap NuGet packages so I also removed those in a separate commit. Basically you first need to remove the package EPiServer.ServiceLocation.StructureMap and then remove packages structuremap.web-signed and structuremap-signed (if they are left). Remove StructureMap from web.config assemblyBinding if it is there. Then install EPiServer.ServiceLocation.StructureMap 2.0.0 (or later version) back (it should also bring the structuremap and structuremap.web packages back).

Closing words

So the actual upgrade was quite easy and only few changes needed to be done to the custom code. Amount of changes needed to be done really depends on your solution if you have heavily used the IPropertyModelHandler interface which has changed to IPropertyModelConverter but as you know now what needs to be done – “it’s monkey coding to make your solution work” (what I mean is that a trained monkey can do the replacing :D).

Quickly testing the API after the upgrade and comparing the returned results — looks like it still works the same.

As a closing note, this was just my take on this and making assumptions that this is how the upgrade should be done in the simplest case. I take no responsibility if you use this code and blow up your implementation 😀

EPiServer, Episerver 11, OIDC

Using OpenID Connect with Episerver

In this post I will show you how you can easily switch Episerver to use OpenID Connect for authentication and authorization. I’ll use the Episerver MVC Alloy with Find search service and cover the common issues you might face when implementing this.

I know I’m not the first one to blog about this and I myself have learned from the previous posts and believe I will add more knowledge to those posts. If OpenID Connect (OIDC) is something new to you I suggest that you first have a look at the OpenID Connect site.

To be able to use OpenID Connect you first need a service that you can use as the Identity Provider (IdP). In this sample I will be using IdentityServer4 and I have created a .NET Core sample solution derived from IdentityServer4.Quickstart.UI. You can get my solution from my GitHub repository.

If for some odd reason you don’t know Episerver Alloy MVC sample site then it is time to download and install the Episerver CMS Visual Studio extension and play around with Alloy.

Rest of the post assumes you are using my InMemory IdentityServer cofiguration.

For the sample implementation I’m using Visual Studio 15.8.4, .NET Framework 4.7.2 and Episerver CMS Visual Studio Extension version 11.4.0.370.

If you are creating a new Episerver project and want to use OIDC then you would just skip the MVC Alloy creation steps and use the parts where the needed NuGet packages are added + web.config changes. So skip to the ‘Add OIDC implementation needed NuGet packages‘ title (Editorial note: isn’t it nice when you can’t create links to the same page).

Create Episerver MVC Alloy site

First step is to create the Episerver MVC Alloy site which we’ll be switching to use OIDC. So, start Visual Studio and create a new site using the ‘Episerver Web Site’ template.

  • .NET Framework 4.7.2
  • Select the Alloy (MVC) template
  • Ensure ‘Configure Search’ is checked
    • and ‘Episerver Find’ is selected
  • In real projects, the next step would be to configure Episerver UI and Util paths to something else than the defaults!
  • Update all Episerver NuGet packages
    • currently update 232
    • make sure you have Episerver Find 13.0.3 or greater
      • we later add a package that requires Newtonsoft.Json 11+
  • For now leave the nuget.org feed NuGet packages alone

Remove ASP.NET Identity from Alloy solution

Alloy uses ASP.NET Identity but we want to replace that with OpenID Connect so the next step is to remove that implementation. For demo purposes you could just leave those hanging there but for this posting to apply as guide for fresh customer projects I will first remove the ASP.NET Identity.

Some of the configurations we need with OIDC are the sames that Alloy has already added to web.config and also has added the Startup.cs file which contains the OWIN configuration. We will re-use those in the OIDC implementation.

  • Open Startup.cs
    • Delete all code inside the Configuration method
    • Comment out everything in the file
  • Delete the file: Business\AdministratorRegistrationPage.cs
  • Delete the file: Controllers\RegisterController.cs

Next step is to remove some NuGet packages added by the Alloy template. Some of the NuGet packages we will be adding back in the coming steps – this is done just that this sample is usefull when creating a new customer project so you know which NuGet packages are actually needed.

  • Remove the following NuGet packages (in the order they are in the listing)
    • EPiServer.Cms.UI.AspNetIdentity
    • Microsoft.AspNet.Identity.EntityFramework
    • Microsoft.AspNet.Identity.Owin
    • Microsoft.AspNet.Identity.Core
    • Microsoft.Owin.Security.OAuth
    • Microsoft.Owin.Security.Cookies
    • Microsoft.Owin.Security
    • Microsoft.Owin.Host.SystemWeb
    • Microsoft.Owin
    • Owin

Add OIDC implementation needed NuGet packages

Add the following NuGet packages as we will need these in the OIDC implementation. These packages will also install all required dependencies naturally.

  • Microsoft.Owin.Host.SystemWeb, current latest version 4.0.0
    • if you don’t add this, your OWIN startup assembly Configuration method will never be called
  • Microsoft.Owin.Security.OpenIdConnect, current latest version 4.0.0
  • Microsoft.Owin.Security.Cookies, current latest version 4.0.0
  • Update this package, Microsoft.IdentityModel.Protocols.OpenIdConnect, current latest version 5.2.4
  • IdentityModel, current latest version 3.9.0
    • has dependecy to Newtonsoft.Json >= 11.0.1 so that’s why we had to install the prerelease of Episerver Find
    • the 3.2.0 version is what you can install if you have to use Newtonsoft.Json 10.x but this will cause you some problems with dependant packages, pulling .Net standard packages which you don’t actually need but I’ll add a comment about this at the end

Now you can optionally update all the remaining nuget.org feed packages.

Prerequisites configuration to implement OpenID Connect in Alloy

Next step is to make some changes to Startup.cs and web.config to preparae the solution to usee OIDC in Alloy site.

  • uncomment the previously commented out code in Startup.cs
    • if this was a new Episerver project then here you would add the Startup.cs file to your solution, see Microsoft documentation about it
    • assuming you have deleted all code inside the Configuration method
  • remove the broken using clauses (leftovers from ASP.NET Identity)
    • Microsoft.AspNet.Identity
    • Microsoft.AspNet.Identity.Owin
    • EPiServer.Cms.UI.AspNetIdentity
  • add EPiServer logging abstraction
    • addusing EPiServer.Logging;
    • addprivate static readonly ILogger Logger = LogManager.GetLogger(typeof(Startup));
  • edit web.config
    • add attribute enabled=”false” to roleManager node
    • NOTE! The correct authentication, membership and rolemanager web.config configuration is documented here by Episerver (see the title: Prerequisites)
      • this page also documents the needed configuration for ‘SynchronizingRolesSecurityEntityProvider

Implementing the OWIN configuration

The implementation uses OWIN and OWIN middlewares to configure the application.

  • Middlewares used
    • Cookie based authentication
    • OpenID Connect authentication

As much as I would like to copy paste the whole code here it really isn’t an option with my current blogging engine – the page blows up 😀 So all code is in my public GitHub repository – also allows me to update the code if there is a need and it should still work as an example for you. I think I have commented the code well but if something is unclear you can ask in the comments or in GitHub repo issues and I’ll try to answer.

The implementation can be split to two parts: configuration and event handling. First the code configures that we use cookie based authentication (used after OIDC authentication) and we use sliding expiration so that framework can renew the authentication cookie automatically (see code comments).

Next the OIDC middleware is configured using UseOpenIdConnectAuthentication method. Here we set the for example the client ID and secret and in ResponseType we define will be using hybrid flow (code id_token). Last step is to handle the OIDC authentication notifications. The main notifications we are interested are the ‘RedirectToIdentityProvider‘ and ‘AuthorizationCodeReceived‘ (and then naturally there is the ‘AuthenticationFailed‘).

RedirectToIdentityProvider (IdP) happens when user is not authenticated and tries to access a protected resource or the user is authenticated and is logging out. The notification contains the ProtocolMessage.RequestType which will be used to decide are we logging out of the application or trying to access a resource that requires authentication. The Episerver sample contains a check for is the user already authenticated but doesn’t have access to the requested resource and does a 403 (Forbidden) response to avoid redirect loop to IdP so this is also included in my code.

I’ve also added code that handles AJAX calls, the sample contains a simple check for XMLHttpRequest header and if the header is present then it’s an AJAX call. This is used in the authentication handling to keep returning 401 for AJAX calls as otherwise if for example you authentication cookie has expired (you were on a lunch) but you still have Episerver edit mode open in your browser. If the code returns HTTP status 403 in this case for DOJO it doesn’t allow user to login but if we return 401 HTTP status it will redirect user to authentication (which I think we want in this case).

AuthorizationCodeReceived is the place where the successful authentication is handled (in our case as we get the authorization code). In this stage OWIN middleware has for example validated the received JWT token (including signature validation). Next in the code we will exchange the authorization code to access token and then validate that the authorization code token and access token have the same Issuer and Subject values (as the specifications say in hybrid flow).

The middleware has created a ClaimsIdentity (notification.AuthenticationTicket.Identity) but we will not use that but create our own ClaimsIdentity. We could have modified the created ClaimsIdentity but I think the code is cleaner and we know for sure what is added to the claims when we construct our own ClaimsIdentity. Note! you want to keep the claims in minimum as these are stored to the cookie stored to users browser so you want to keep that small.

After creating the new ClaimsIdentity and creating a new AuthenticationTicket using that the last part is to make Episerver aware of the user and “roles” the user has. The code gets an instance of ‘ISynchronizingUserService‘ and calls its method ‘SynchronizeAsync‘ passing the ClaimsIdentity to it.

A few words about the ISynchronizingUserService and ClaimsIdentity

I couldn’t find much documentation about this so I had a peek to the default implementation and what it does.

When we create the new ClaimsIdentity the constructor takes nameType and roleType parameters. These “claim names” define what claim type will be used as the name and role claims. In my sample I set the nameType to “epiusername” type, this is my custom named claim type but this could be anything you like I just used that name here to indicate that this claim will be used as the username (NOTE! this really really should be unique) and the displayname in Episerver edit mode. The default Episerver implementation checks what claim type is to be used as the name claim and uses that for username (so in this sample it will use the value of “episerverusername” claim). Same goes for the role(s) claim type, what ever name is set as the roleType Episerver will use those claims as roles when synching.

While peeking the Episerver implementation I noticed that it will also look for the following claims (Microsoft claims under namespace System.Security.Claims) in the ClaimsIdentity:

  • ClaimTypes.Email
  • ClaimTypes.GivenName
  • ClaimTypes.Surname

So if you add those claims with a value you will get those synched to Episerver database too and the tables those are stored to are: tblSynchedUser and tblSynchedUserRole.

oidc-alloy-users-roles

Setting up Alloy access rights

After you run the application and can login to Episerver using OIDC you will not have any editing rights but you have access to admin views. Next we will setup simple editing rights for all ‘SitePublishers’ role/group members.

  • go to admin view ⇒ Set access rights
  • select ‘Root’ node and click ‘Add Users/Groups’
    • select ‘Groups’ in the ‘Type’ dropdown and click ‘Search’
    • double click the ‘SitePublishers’ and click ‘OK’
    • select all checkboxes for ‘SitePublishers’ group row
    • select the ‘Apply settings for all subitems’ and click ‘Save’
      • click ‘OK’ to the confirmation dialog

Now you can edit content with users that belong/have the ‘SitePublishers’ claim.

Setup issues

I started preparing this blog posting over four months ago and a lot has happened during that time (in private life) and now this is the third time (third time’s a charm ;-P) I write this posting. So back to the issues you might face. I can think of only one if you are using Episerver Find but you cannot update to the 13.0.3 version or higher. The used IdentityModel package latest version requires Newtonsoft.Json 11+ and you cannot use that Find if using version prior to 13.0.3. The highest version of IdentityModel you can install is then package version 3.2.0 which will add a bunch of not needed NuGet packages to your project:

  • System.IO
  • System.Runtime
  • System.Security.Cryptography.Encoding
  • System.Security.Cryptography.Primitives
  • System.Security.Cryptography.Algorithms
  • System.Security.Cryptography.X509Certificates
  • System.Net.Http
  • (Thank you .NET standard)

The effect depends on your Visual Studio 2017 version, before VS version 15.8.0 those packages “only” show as missing references when looking at project references. After 15.8.0 version (with default VS settings) VS adds binding redirects to web config for ‘System.Net.Http‘ and ‘System.Runtime‘. Now if you try to run the web app it fails to start with Exception. Solution is to remove those binding redirects BUT if you update or add new NuGet packages those are nicely added back so you need to remember to remove those again.

Real world issue

Well this is a real life issue we had in one project. Everything was working in our development and test environments but when it was time to use customers environment the signature validation failed for the returned authorization code. Erm, we are using a standard and everything should just work. Even my very good friend Google didn’t at first offer me a solution until finally I happened to stumble upon a case where an OpenId Connect implementation JWK endpoint returned modulus contained 0 as first byte. Well it was the same with our case so we had to implement a custom SignatureValidator and pass that to TokenValidationParameters.SignatureValidator.

This implementation used the JwtSecurityTokenHandler to ReadJwtToken from the token it is passed. Then it used the DiscoveryClient to get the public keys and use the parsed token header Kid (key identifier) value to find the correct key from discovery response. Then the key was transformed to byte array and checked if the first byte is 0 and if it was the case then remove the first byte and do the signature validation with correct modulus. Have a look at this post on Stack Overflow about signature validation.

Other sources about Episerver and OIDC

Some previous blog postings about using OIDC with Episerver, not in any particular order and sorry if I missed your blog post. Ping me and I will include it to the list.

EPiServer, Episerver 11, InitializationModule, TinyMCE

How to add JavaScript callbacks to TinyMCE initialization in Episerver

Some TinyMCE plugins use JavaScript callbacks which you can define in the initialization. Episerver uses TinyMceSettings class to pass the initialization configuration for the editor instances. Internally Episerver serializes the settings to JSON to pass to the editor instances but how can you serialize a JavaScript function into JSON? You can’t — well strictly speaking, you actually can but it will not work in this case (you could use custom converter too, but the code will blow up in this case when Episerver tries to deserialize the JSON, so the answer is still – no it will not work).

I myself wanted to modify the media plugin video embed HTML but couldn’t figure out how pass the callback function to the configuration. Thanks to Episerver employee Grzegorz Wiecheć and his solution on the Episerver world forum I got it to work. The solution is quite simple, just pass an initialization script to your TinyMceSettings configuration in your TinyMCE initialization module. Have a look at Episerver documentation about TinyMCE configuration or my first look at TinyMCE posting.

Create the initialization script

I’m using Alloy sample site for this demo so I added a new JavaScript file under the folder ‘ClientResources/Scripts’ named default-callbacks-for-tinymce.js. In my demo I specify callbacks for the color picker and media plugins. Here is the code:

define([], function () {
  return function (settings) {
    console.log("initialize TinyMCE default callbacks);

    return Object.assign(settings, {
      color_picker_callback: function (callback, value) {
        console.log("color_picker_callback called");
        // return custom color, this is where you would
        // implement your own color picker functionality
        callback('#839192');
      },
      media_url_resolver: function (data, resolve) {
        console.log("media_url_resolver called with url: " + data.url);
        // just a demo, if the url contains youtube and embed, use this template for the video
        // NOTE! The url in this demo needs to be the embed url, like https://www.youtube.com/embed/NxviGrBMKKY
        // that allows the video to be iframed, other urls have header x-frame-options:sameorigin
        if (data.url.indexOf('youtube') !== -1 && data.url.indexOf('embed') !== -1) {
          // removed the opening iframe < in this post and the last >
          var embedHtml = 'iframe src="' + data.url + '" width="666" height="666" class="specialYoutubeVideoEmedFrame" ></iframe';
          resolve({ html: embedHtml });
        } else {
          // use the tinymce default template (passing empty string in the html makes tinymce to use the default)
          resolve({ html: '' });
        }
      }
    });
  };
});

Do note that the color picker callback to my understanding should show your custom color picker and the demo just returns a hardcoded value. If you want to specifu your own colors in the default dialog have a look at the textcolor_map.

Here is the code as a picture because most likely this lovely platform that I’m using will mess up the code above.

tinymce-callbacks-embed-html-code

Configure TinyMCE

Next step is to configure the TinyMceSettings in the TinyMCE initialization module.

var defaultConfig = config.Default()
.AddPlugin("code wordcount media textcolor colorpicker")
.AddSetting("statusbar", true)
.AppendToolbar(" | media | forecolor backcolor")
.InitializationScript("alloy/default-callbacks-for-tinymce");

Above code contains other plugins too but the ones needed for TinyMCE color picker are textcolor and colorpicker plugins. The embed video requires the media plugin. I also append to the toolbar buttons for media, text forecolor and backcolor. Finally add the initialization script.

Running the sample

Running the above code gives us the following for the video embedding.

tinymce-callbacks-embed-html

With the hardcoded “custom color picker” we get they gray background color for text as specified.

tinymce-callbacks-color

Wrapping up

So to be able to define callback functions for TinyMCE configuration we need to use the initialization script. With this approach we can have default callbacks in one file and if we need specific initialization for certain editor instances we would create separate file and load that as the initialization script in the initilization module.

.Net, ASP.NET MVC, EPiServer, Episerver 11

Update Episerver project to use ASP.NET MVC 5.2.6 version

As we developers like to live on the edge – we usually want to press the Update button next to a NuGet package in Visual Studio. Newer isn’t always better but usually the updated package(s) contains a security fix or some other improvement that you might actually benefit from. In this post I’ll show you what you need to do when you update the Microsoft.AspNet.Mvc package to version 5.2.6.

When you create a new Episerver CMS website you get automatically version 5.2.3 of the Microsoft.AspNetMvc package but as mentioned the latest version currently is 5.2.6 which contains bug fixes and version 5.2.7 is in the pipeline. Have a look at the AspNetWebstack GitHub project and the release notes.

So what are you waiting for – just hit the Update button. After updating the package (well I guess you also updated all the other MS packages related to Razor, WebPages and API) You as the master developer rebuild the project(s)/solution – no errors or warnings, why would there be? OK, let’s run the app locally – works! Commit, pull (with rebase of course), push – get some more coffee and tap yourself on the shoulder, job well done.

So now you wonder what was the point of the posting other than show some activity in your blog? Well, open a view file in Visual Studio and notice that everything isn’t quite right. All those green squirly lines and warning CS1702 with message ‘Assuming assembly reference ‘System.Web.Mvc, Version=5.2.3.0, Culture=neutral, PublicKeyToken=31bf3856ad364e35’ used by ‘EPiServer.Cms.AspNet’ matches identity ‘System.Web.Mvc, Version=5.2.6.0, Culture=neutral, PublicKeyToken=31bf3856ad364e35’ of ‘System.Web.Mvc’, you may need to supply runtime policy‘.

mvc-5-2-6-update-view-warn

So you think it is about a missing binding redirect in web.config but no, correct binding redirect oldVersion=”0.0.0.0-5.2.6.0″ newVersion=”5.2.6.0″ is in place.

Application works and doesn’t produce any errors when running so it has to do something with Visual Studio and Razor views. I myself originally had this issue when I wanted to update to MVC 5.2.4 and some Telerik users had the same problem. So that is where from I spotted the fix to supress the warning CS1702 in views by adding /nowarn:1702 to web.config C# compiler options.

mvc-5-2-6-codedom-fix

Now after adding system.codedom to web.config and opening a view file – Yipee, no more green squirly lines.

This same issue surfaced also on the Episerver World Forums few months later and was also sorted out there using the same method.

So now you say, well great “You just quoted others postings”. Well, true but it also can be considered as sharing information that you might not otherwise find 😉

But, you still can’t use code like this in your view files:

var parent = Model.CurrentPage?.ParentLink;

You will get an error CS8026 with message ‘Feature ‘null propagating operator’ is not available in C# 5. Please use language version 6 or greater.’ Wouldn’t it be nice to use new language features in your view files?

Use Microsoft DotNetCompilerPlatform

To tackle both the issue with CS1702 warning and CS8026 error add the NuGet package Microsoft.CodeDom.Providers.DotNetCompilerPlatform to your project (current version 2.0.1). This will add the “Roslyn” .Net Compiler Platform to your project – support for new language features and compilation performance improvement.

When you rebuild your project and/or do a deployment you will notice that there is now a new folder ‘roslyn’ in your bin folder which contains all the needed files to do the dynamic builds.

Please note that you still need to edit web.config and add the 1702 to compilerOptions in CSharpCodeProvider compiler element. Also when this package is updated the change is lost and you need to remember to add it back.

So now you have two options where from you can choose how to fix the CS1702 warning issue with view files when using Episerver with MVC greater than 5.2.3 version (or until Episerver decides to update their MVC reference). If using the DotnetCompilerPlatform package you also get the added benefit of being able to use new language features in your view files.

Happy coding.

Cache, EPiServer, Episerver 11

Be careful when caching Episerver URLs

Just a word of caution – be careful when you cache Episerver URLs. Reason behind this post is that I was testing some fixes in one of our projects. Did some editing, published and then used the ‘Preview’ in Episerver UI (normally one would preview before publishing :D). Ok — my changes looked good. Logged out and browsed the test environment. Suddenly after clicking some link I was redirected to Episerver login view — erm, what the h**l!? Pressed browser back and viewed the link I had just clicked, indeed it pointed directly to the Episerver edit mode. Hmm, weird.

Caching in the app

The application had some logic to cache some “view model” graph to boost performance. So it created a graph that also included URLs to the site and had logic to clear the cache if some top level stuff changed.

Put your hand down — No, it was not about using FilterForVisitor or some other filter.

Oh god, put that hand down — No, it was not about the developer for forgetting checking for edit mode (EPiServer.Editor.PageEditing.PageIsInEditMode) before caching.

The answer is in the ‘Preview’ mode.

URLs in Episerver

As you might already know there are basically three different kind of URLs used/rendered and these depend on the EPiServer.Web.ContextMode:

  • Default – you are browsing the site
  • Edit – you are in the edit mode (OPE, on page edit or the all properties view)
  • Preview – you are using the preview functionality

So here are sample screen shots from Episerver Alloy MVC demo site how the urls work and different ways to get the current EPiServer.Web.ContextMode. The ‘Created url‘ I’ll explain later, but it is the way how you can always request certain ContextMode URL.

First in edit mode:

alloy-edit-mode-url

As you can see in the screenshot PageIsInEditMode returns true and ContextMode is ‘Edit’.

Next a screenshot of preview mode:

alloy-preview-mode-url

Notice that now the PageIsInEditMode is false but as we can see from the screenshot we are still in “Edit” but previewing the page. Now the ContextMode is ‘Preview’. Notice that the ‘Created url’ is still the same as in Edit mode case.

Last a screenshot of browsing the site:

alloy-default-mode-url

Notice the ‘Created url’ is the same in all screenshots but the Url.ContentUrl changes per ContextMode, there is also the querystring parameter epieditmode in Edit and Preview cases.

So what was wrong in the caching implementation?

The code was checking that if we are in edit mode – don’t cache and don’t use cache. So far so good but the problem was caused by me when I published content and then switched to preview. The application correctly cleared the cache as dependant data changed but didn’t cache (which was correct as I was in edit mode). When I switched to preview code tried to fetch data from cache, it was empty – loaded data and crafted the required model, checked that we are not in edit mode and cached the model. The code was using the IUrlResolver.GetUrl(contentReference, language) overload which returns the URL depending on the current ContextMode, so we ended up caching the preview mode URLs.

So how to fix this kind of caching issue?

There are two ways to fix this:

  • check that you cache only when the ContextMode is ‘Default’
  • create the URL always for the ContextMode ‘Default’

How to get ContextMode and decide the current mode?

The easiest way is to get the ‘EPiServer.Web.IContextModeResolver‘ from the IoC container. Use constructor injection or fallback to ServiceLocator if you can’t use constructor injection. See Episerver documentation about dependency injection.

So if you used constructor injection then you get the mode like this:

ctxModeResolver.CurrentMode;

or if you have to use ServiceLocator then you would get it like this:

var ctxModeResolver = EPiServer.ServiceLocation.ServiceLocator.Current.GetInstance<EPiServer.Web.IContextModeResolver>();
ctxModeResolver.CurrentMode;

Now that you have the ContextMode you can compare the value to the enum values and do decisions based on that.

But Episerver provides also an extension method out of the box to know if you are in Edit or Preview mode so you most likely want to use that instead of creating your own comparisions.

ctxModeResolver.CurrentMode.EditOrPreview();

The extension is in the ‘EPiServer.Web’ namespace.

You can also get the ContextMode from the current request (HttpRequestBase) so something like this:

// this used here just for reference, could be some context too
// where from you get the Request object
this.Request.RequestContext.GetContextMode();

The GetContextMode() is an extension method and it is in the namespace ‘EPiServer.Web.Routing‘.

How to create URLs always for Default view mode

You can pass ‘VirtualPathArguments’ to UrlResolver or ‘UrlResolverArguments’ to IUrlResolver – depending which one you are using.

So with UrlResolver (resolver gotten from IoC):

string url = resolver.GetUrl(Model.CurrentPage.ContentLink, Model.CurrentPage.Language.Name, new VirtualPathArguments() { ContextMode = ContextMode.Default });

With IUrlResolver (iurlresolver gotten from IoC):

string url = iurlresolver.GetUrl(Model.CurrentPage.ContentLink, Model.CurrentPage.Language.Name, new UrlResolverArguments() { ContextMode = ContextMode.Default });

So this way I produced the ‘Created url‘ in the screenshots.

If you ask should I use ‘UrlResolver’ or ‘IUrlResolver’ – go which ever, I prefer the interface.

Wrap up

So hopefully this helps you to avoid similiar situation and maybe the ‘ContextMode.EditOrPreview();‘ was something new even to the seasoned Episerver developers.